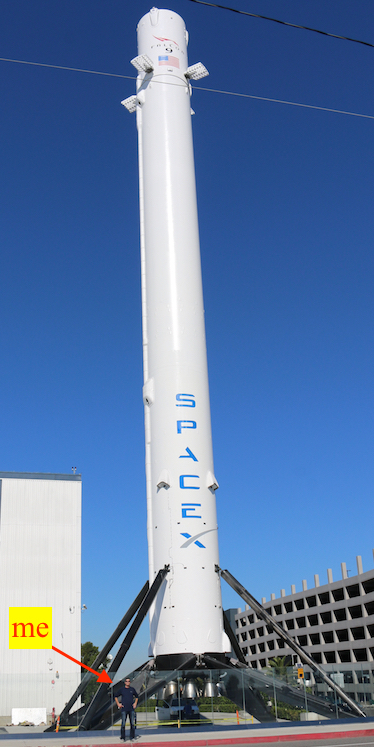
This photo was taken near here
Wow: Dr. Tom Bensky
Professor of Physics
Cal Poly Physics Department
Office: 180-616
Phone: 805-756-7655
email: tbensky@calpoly.edu
(Note: I am not affiliated with SpaceX. I just love [their] rockets.)
Teaching
Introductory Mechanics
- Use computer graphics in intro. mechanics. Physgl.org and my book.
Longitude, Time, and Navigation (ASTR 324 here)
- My book on it all (Lulu), and Amazon, iTunes
- Published paper on this class
. - Another published paper from the course (Online materials)
- Course syllabus
- Course flier
- Final project
- Precision timing using a star
- Find your latitude and longitude using the Sun
- Find (lat,lng) points using OpenStreetMaps.
- Plot a series of (lat,lng) points using OpenStreetMaps.
- Plot a series of (lat,lng) points using OpenStreetMaps.
- Plot a series of (lat,lng) points (and the distance of each from the first) using OpenStreetMaps.
- Sumner's journey up St. George's Channel.
- Spreadsheet to compute (lat,long) from deduced reckoning steps.
Electronics
Most of what I know about electronics was self-taught by reading everything I could find by Forrest Mims and building circuits in my garage with stuff I bought at Radio Shack or here. I find Mims' hands-on, active and "circuits that do something" approach goes quite far for both teaching and learning electronics. I think this book is one of finest introductory books on electronics ever written. I put together the core of these labs (C. Hoellwarth and M. Moelter helped a great deal to get these labs in shape) to cover our 10 week electronics class.- Introduction to DC
- RC Circuits
- AC Electronics
- RC Filters
- Diodes
- Op Amps (with Comparators)
- Digital Electronics
- Transistors
- Arduino
Advanced Electronics
I started running this class in "project/makers" mode. Here are the three projects students are to do over the course of the quarter. I thank my colleague Matt Moelter for his help in refining this curriculum and jumping in and teaching it with me.- Course Syllabus
- Warm-up project
- Project #1
- Project #2
- Project #3 (written/designed by M. Moelter)
Optics
The labs in our department tend to be rather like “cook-books.” We put students in front of a equipment (a good thing), but then give them step-by-step instructions like “turn the voltage to 10, then write down the ion current” (a bad thing). Afterward, we tell the students what their data should look like, and even (exactly) how to analyze it. We don’t give the students much room to think on their own. To this end, a nice paper came out about giving labs where you remove the procedure from a typical lab, thus letting the students debate and assess what needs to be done to achieve a particular (measurement) goal given some equipment. So, in the Winter of 2015, I did this for our optics labs (that is, removed the procedure from the labs). I kept the labs to just two pages, with no procedure, and a clear grading rubric for each. Here are my revised labs.- Lab 1: Cone in water made with a green laser
- Lab 2: Coupling laser light into a fiber optic cable
- Lab 3: Dispersion of white light with a prism (this lab leads to some awesome results).
- Lab 4: Focal length of lenses
- Lab 5: Telescopes
- Lab 6: Polarization of light
- Lab 7: Polarimetry of sucrose in water
- Lab 8: Vibration analysis with a Michelson Interferometer
- Lab 9: Electronic detection of light
Notes:
- For some of the labs, I let the students take a break from writing formal lab reports, allowing them to draw “howtoons” of their results instead. Here’s what I got for the polarimetry lab: click.
- Although removing the procedure and allowing the students to think sounds like a good idea, it wasn’t. The students appear to love being told exactly what to do (a la the “cookbook” mode), and would spend most of the lab period desperately searching the web for instructions. One student even found a cookbook lab at another university and raised his hand to ask me “can I just do this instead?” Oh well.
Introduction to the Solar System (ASTR 101 here)
I started teaching ASTR101 a couple of years ago. It is a very fun class to teach (except when the students got mad at me for planning an exam on the day before Halloween, which prevented them from being able to “get ready for Halloween”). Here are a few “hands-on” activities I assigned, in order to get the students out and “looking up” at the sky.Arduino
As you probably know, the Arduino is a hugely popular microcontroller. A while back, as part of our 'advanced electronics' class (PHYS 357), I started using the Arduino as the core of a data-logger project. In this project, students would choose a sensor (from dozens available, like temperature, pressure, etc.) and interface it to an Arduino. They would then also interface the Arduino to an SD-Card module, and program it to log readings from their sensor, to the SD-card, for later analysis. Construction of the data logger aside, the most creative element of this project is in allowing the students to decide how and where to deploy the data-logger. I've seen students take it on hikes, attach it to their cars or bikes, take into exercise classes, and even put it on a horse saddle while riding. I've come to like this project because taking data in an automated fashion (i.e. no paper, stopwatches, yardsticks, string, tape, etc.), retrieving the data, plotting the data, then coming up plausible 'story' to describe the data is to me, the epitome of what a scientist does. I have found this project to be remarkably adaptable to a variety of audiences. Currently, I've done it witg advanced physics majors, high school juniors/seniors, and freshman Liberal Studies majors. Here are copies of my core lessons (thank you M.M. for proofreading these). These were run over 4 class sessions, using about four hours of class time, culminating in a lesson on how to make a proper plot (title axes, etc.) and a presentation to the class on the results (i.e. the 'story' behind the data).- First, we start with an introduction, followed by a another on powering the Arduino.
- Next, students think of a sensor of interest, and get a basic interface going, that displays the sensor data to the serial monitor: light, CO2, temperature, or pressure.
- Lastly, students interface it all to the SD-Card: light, CO2, temperature, or pressure.
- I then give them some tips on making a good plot.
Prolog and Symbolic Processing with Kinematics Problems
If you look carefully at physics problems in an introductory physics book, they can all be solved algorithmically. That is, if you simply find or compute quantities, in the right order, using either 1) common sense, or 2) the equations given in the book, you'll get the correct answer, every time. You just have to find that 'right order.' This paper I wrote a while back discusses this in the context of 1D kinematics problems, involving only one moving object. Here is the code for it, if you want to investigate it further. I have an entirely new approach to computer-automated solving of kinematics problems outlined here: https://arxiv.org/pdf/2508.10920Research
I have a couple of areas of research interest:- Atomic clocks and precision timekeeping
- AI, in particular probing how neural networks work and using them in physics applications (I particularly like training neural networks on large, scientific data-sets (which can be difficult!) It's particularly fun to watch training progress as in this example.
- The science and history of navigation
AI/Neural Networks
I have two projects going on, one involving "Physics informed neural networks" (PiNNs)s and the other involing Convolutional Neural Networks. Here are my latest results:- PiNNS with projectile motion
- CNNs with waveforms
- Basic neural networks
- I also do a bit of work with Prolog and Constraint Logic Programming
Possible student projects
See here for possible projects.Atomic Clocks
In recent years (with funding help from Cal Poly's RSCA grant, the Frost fund, and the Physics Dept) (and actually a non-trivial amount of my own money!), we've (me and a few students over the years), have been working on developing a Rubidium-vapor atomic clock. It was a tough thing to build (no papers on a clock of this scale), and even tougher to find what is called the Rb87 0-0 clock reference. Here's the clock itself (in my garage during the 2020/2021 lockdown/pandemic):
Possible student projects
- Find Q of resonators helical resonators
- Extrapolate LIA resonance to find time-constant=0 point
- Vary A (modulation depth) and see if width of resonance can be found by washing out the dip
- Look at LIA plot of in-phase channel (not R) to see zero crossing can be seen (not the |derivative|)
- Redo long-term centroid tracking to find Q and time loss/day
- Look at resonance position vs LIA time constant and see if this can be extrapolated to "time constant=0" to find actual resonance.
- Set microwave source on resonance (8221 Hz at 300ms) and AM microwave source. See if LIA time constant can be reduced and/or if stability is now amplitude of resonance. Any phase info?
- Resonance position vs cell temperature (e.g. pressure of N2). See "Compact Optical Atomic Clock Based on a Two-Photon Transition in Rubidium" by Martin et.al in Arxiv Fig 3.
- Do Q test for various LIA time constants and/or cell temperatures. (LIA time constant and cell temp (i.e. buffer gas pressure) should both drive the centroid position.
- Lucas H. is working on a great project involving assessing the resonance structure of crystals. We put it all in a poster at the 2025 BCSM Research Conference
Pictures
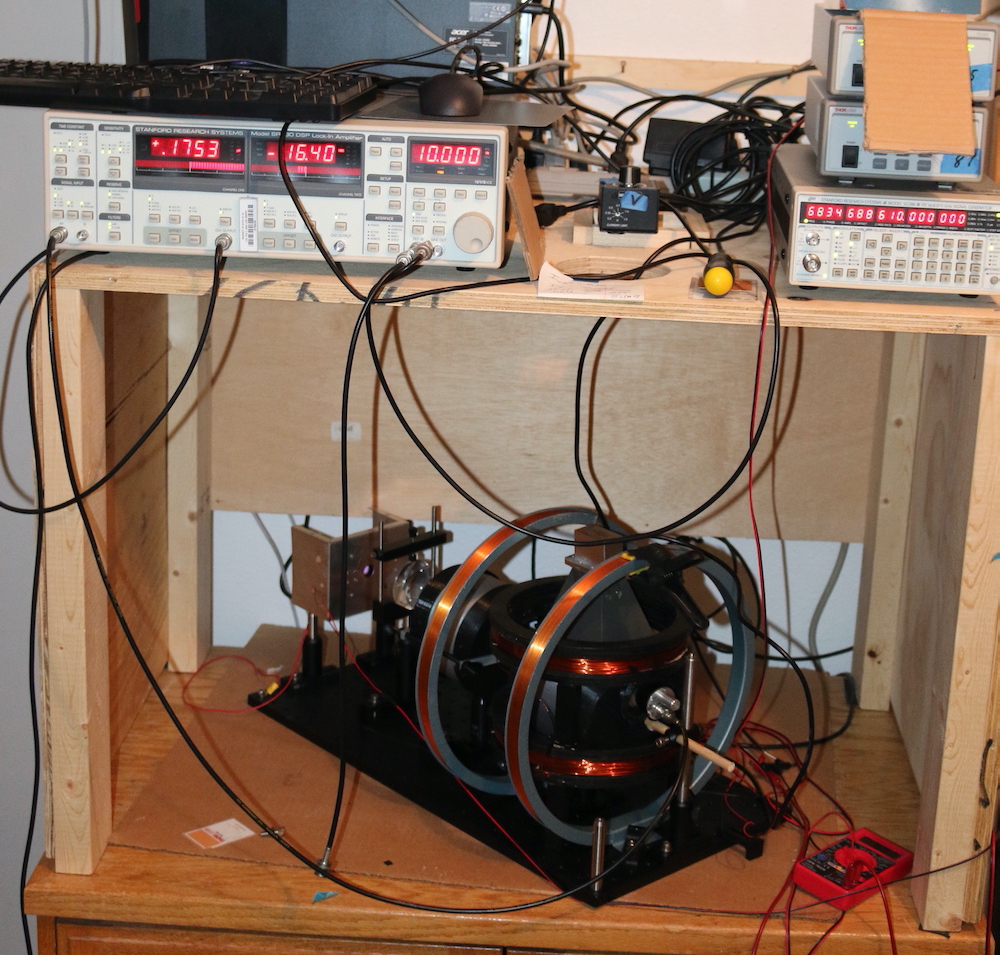
The lock-in amplifier is in the upper left and the microwave source at the upper right. Here's a close-up picture:

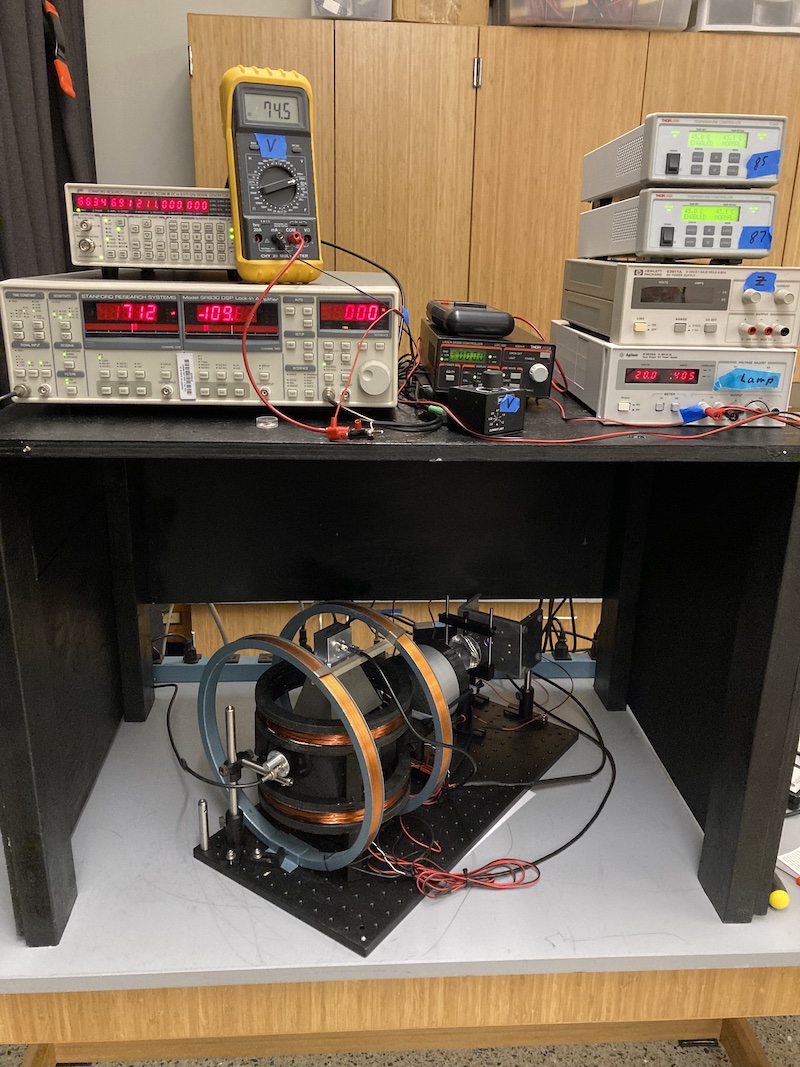
That's the (borrowed!) Rb-lamp in the back (pinkish glow), then a focusing lens, then the Rb85 cell, and then the Rb87 cell buried in the field controlling/canceling Helmholtz Coils. Note the microwave horn on top of the Rb87 cell as well. The gray cases are 3D printed to contain the actual Rb vapor cells in their temperature controlled environment of about 35C. Here's another picture of the apparatus now housed in 180-630 on campus:
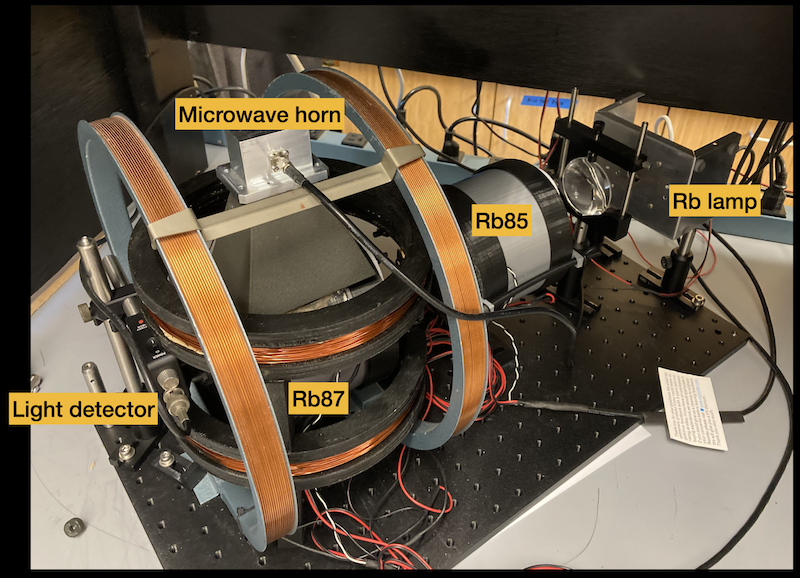
Here's a picture with all of the parts labeled.
After many, many arduious hours (weeks, months, ...) of searching, scanning, searching, and scanning, we finally got everything right and found the 0-0 resonance as shown here.

Here's another, with a larger lock-in time constant:
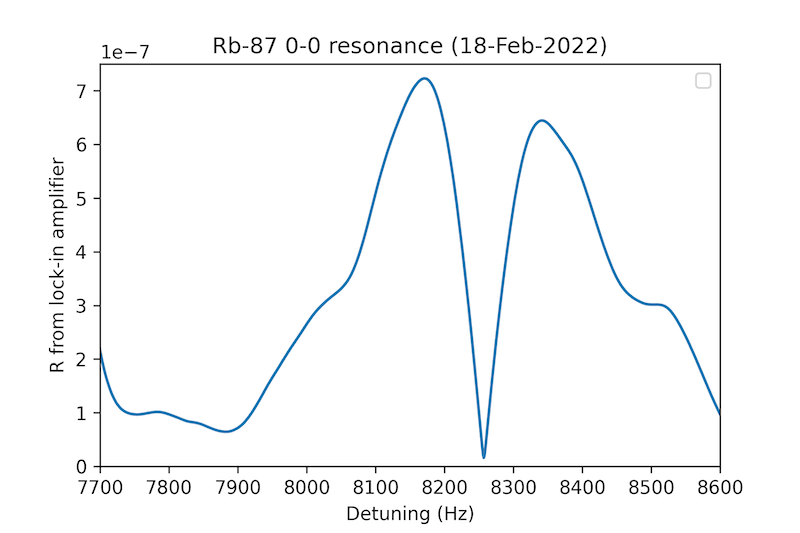
The center of the resonance shows up at about 6,832,684,610 Hz + 8,200 Hz, shifted primarily by the pressure of the N2 buffer gas. If you're still here, we have some notes compiled that we sent to a few groups asking for help. Work continues.
We are currently looking into Zeeman shifting of the 0-0 resonance and with strong-ish (>2G) magnetic fields. Here is a typical data set.
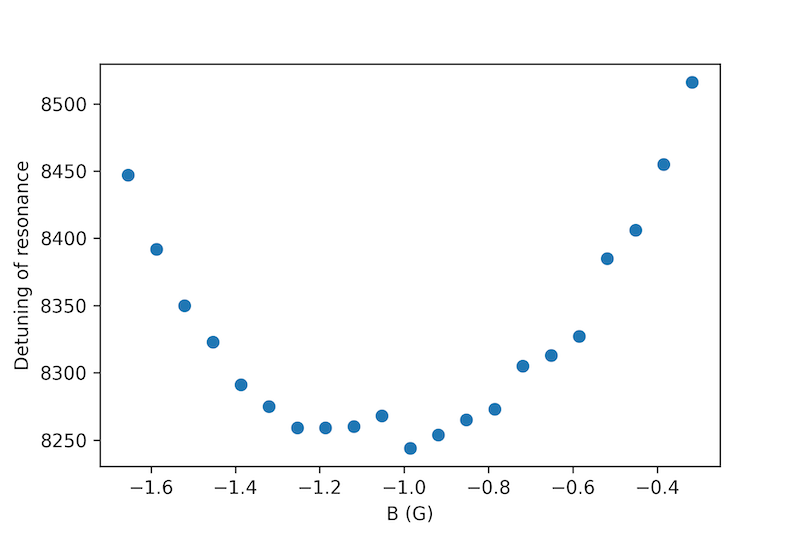
Here, we ramp the current (hence B-field) in the horizontal Helmholtz Coil, and monitor the frequency at which the 0-0 resonance occurs. The quadratic nature of the frequency shift is clear. The minimum about B=-1.0G or so is due to the Helholtz coil field having to cancel the horizontal component of the Earth's magnetic field (in order to reach a net zero-field environment for the atoms). It's nice to have an atomic response to the field (as opposed to having to rely on a gaussmeter). Scans like this give us a good operating reference for the clock (in this case, we'd set the horizontal field to -1.1G and proceed). The vertical Helmholtz coil also has an effect on the resonance (but more the in its sharpness, as opposed to its position). Students are looking into both of these coils and their effects. The "bump" around -1.0G is always present (and we're not sure what is causing it).
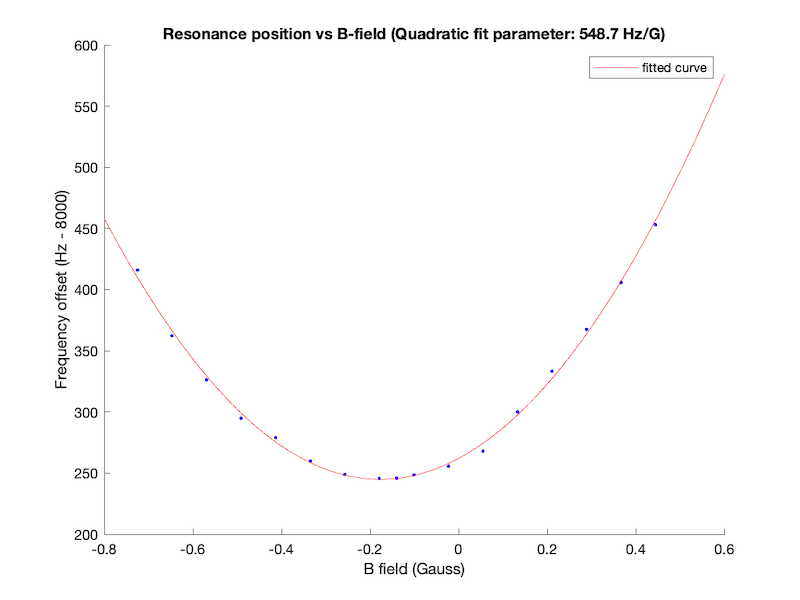
Here's some data physics major Daniel P. took in the Fall of 2022:
Recent Publications
- Use of a genetic algorithm in university scheduling for equitable and efficient determination of teaching assignments (ArXiv, posted Sept 10, 2025)
- Use of a genetic algorithm to find solutions to introductory physics problems (ArXiv, posted Aug 18, 2025)
- Neural networks for use by physics majors (Physics teacher, accepted and in press, May 2025)
- Sun Photometry for Introductory Students (Physics Teacher, published Dec 2022) [pdf]
- Numerical Adaptations of Captain Sumner's 1837 journey: a context for teaching celestial navigation (Journal of Navigation, published April 2022) [pdf]
- Teaching and learning mathematics with Prolog (ArXiv, posted Aug 2021) [pdf]
- The Zener diode: generating gamma-ray statistics without the gamma rays (Physics Education, published July 2021) [pdf]
- A no-phone/no-app contact tracing hardware token (ArXiv, published August 2020) [pdf]
- A CNCed wooden clock escapement for student use. (Horological Journal, published June 2019) [pdf]
- Teaching Celestial Navigation using Google Maps (Online materials) (Journal of Navigation, published March 2018) [pdf]
- Community outreach with Play-doh electronics (Physics Teacher, published Oct 2016) [pdf]
- Computer guided solutions to physics problems using Prolog (Computing in Science and Engineering, published Jan/Feb 2010) [pdf]
- (More papers as well prior to 2013)
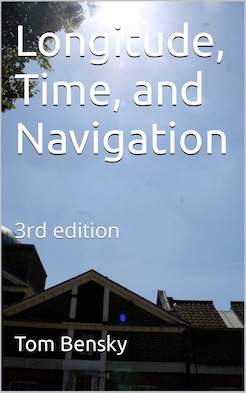
- And two books...(Navigation book is now in 3rd edition!)
 |  |
- I also enjoy writing about electronics for "Nuts and Volts" Magazine. I published this one (about R-2R ladders) in Nov 2015 and another on LEDs, lightbulbs and circuit junctions in the Feb. 2018 issue. See my author page.
Electric Car
Using an hour here and hour there a while back, I converted an old 1992 VW GTI to a 100% electric vehicle. Here was the first step a while back, taking out the dirty old engine.


Update Aug 2015
To 2013 or so, I drove the car about 8,000 miles before the lead-acid batteries gave out. They would charge fully, but then be completely depleted after driving down the street and back. So the car sat in my garage for about 2 years or so, until I decided to take the plunge and buy some Lithium-ion ($$$) batteries. I bought 8-Enerdels, at 14.4 each (32 cells, with a max voltage of 3.9 volts), so the car is now 125V when all charged up. Here are some pictures...4 batteries in the front:


Longitude
So what's this longitude thing all about? For starters, read my paper about it (see ASTR 324 above) or the book I have been writing (see ASTR 324 above). Like everyone else, I read Sobel's book on "Longitude" back in the early 1990s. I had the opportunity to teach a class in London during the Summer of 2008, and I thought a course that examined the science behind the longitude problem would be a great fit. It was, and I have since turned the class into an general education class here at Cal Poly (ASTR 324) and taught it again a few times in London during the summers.I presented a poster about the class here.
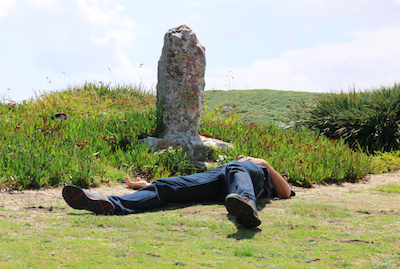
The whole story is just awesome, and has been a big part of my professional work. I've published two papers on it, a self-published book, and even got in to amateur horology. As a true "longitude disciple," I found Sir Cloudisley Shovell's Memorial here, and even posed the way the poor guy was likely found:
By the 1700s it was unfortunate that far-reaching expeditions were at great risk because there was no practical method of accurately determining one's navigational longitude. There are records of fateful expeditions both at land and sea5 due to this “longitude problem.” Conditions at sea made this problem particularly serious, and many lives,6 property, and political prowess were lost. The longitude problem is well covered in both erudite and popular treatments. It was established that the simultaneous knowledge of one's remote (or “local”) time and that at a fixed reference point16 would allow for the determination of the relative longitude. Knowing (or keeping) the time at the distant reference point (from afar) was the most problematic issue despite three known methods for doing so. The first involved using the motion of the Moon, the second involved keeping time with a portable chronometer, and the third used observations of the motion of Jupiter's moons. These were all sound solutions17 that lacked a practical implementation. Harsh conditions at sea where accurate navigation was the most critical posed the greatest challenges to a longitude solution. Observing Jupiter's moons at sea was impractical due to the difficulty in tracking them from a rocking ship. John Harrison spent a lifetime pursuing the chronometer approach, while a succession of astronomers employed at the Royal Greenwich Observatory pursued the lunar approach. The interested parties were all competing for the substantial “longitude prize” offered by the British government in 1714. The chronometer approach eventually won, although the techniques using the Moon and Jupiter (on land) all became usable by the late 1700s. The accuracy and ease of use of the marine chronometer caused it to become the dominant longitude-determining tool until worldwide time broadcasts in the early 1900s. The solution to finding longitude took the most convenient leap in the early 1990s, with the availability of the Global Positioning System (GPS). The longitude problem was an outstanding worldwide problem in the 1700s and was eventually solved using principles from physics and astronomy. We find it an appropriate topic for a college-level course for nonscience majors for the following reasons. A course whose topics include the longitude problem, celestial navigation, and timekeeping is an original offering of general interest to students. The longitude problem provides a framework for discussing a variety of scientific topics in support of understanding this problem (and its solution) from a historical and contemporary perspective. The longitude saga also presents an opportunity to demonstrate how science has worked successfully because it contains many of the essential elements seen in current scientific struggles, including a lag between a theory and experiment, pleas for funding, competition from other groups, originality, politics, experimental verification, dedication, and eventual triumph. Initial course planning can be guided with the help of books by Sobel, Sobel and Andrewes, and Dash, which provide concise and popular adaptations of the longitude problem. These books lack the scientific details needed for this course, which are amply supplied by Andrewes. A study of just the longitude problem alone will generally not fill a course consisting of approximately 40 lectures. The longitude problem has two very natural branches, one into celestial navigation and the other into the science of timekeeping. The course itself is also full of basic astronomy and physics; it is quite fun to teach and lots of demonstrations from a physics department demo-room can be used.
Graphics
In recent years, I've embraced the idea of using computer graphics in freshman physics. Here's a book I published about it all.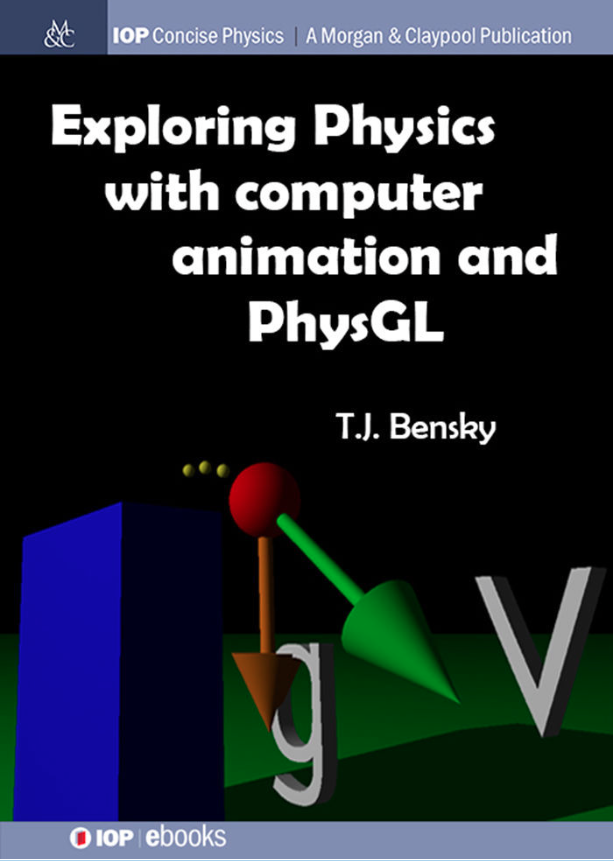
Cover
A paper I wrote with M. Moelter made the cover of the American Journal of Physics for March 2013. Wow!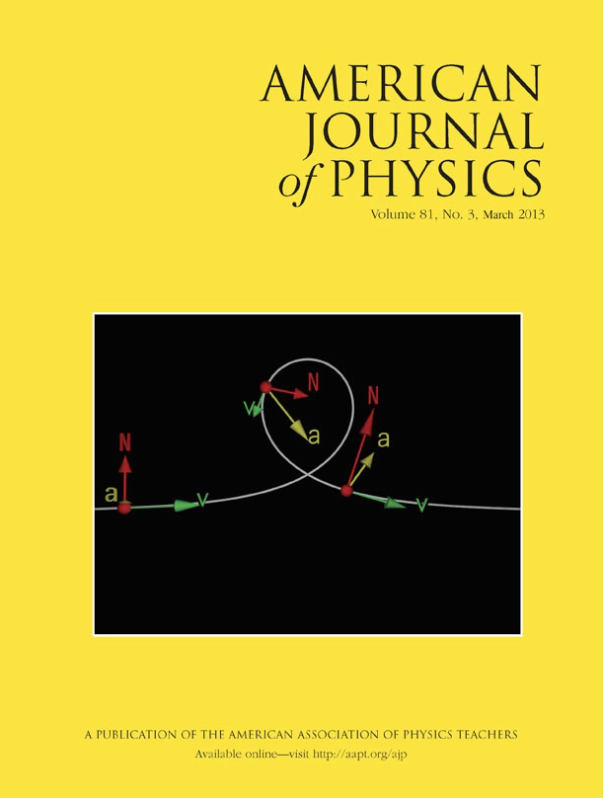
Learn by Doing Lab (LBDL)
The Story...
As part of Cal Poly's CESAME program, we developed a "physics learn-by-doing lab" that we started running in the Spring of 2012. The target audience for the lab is 3rd - 5th graders. It involves building electronic circuits using Play-Doh. Why Play-Doh? A while back, I saw a Ted talk on "Squishy Circuits," which uses conductive properties of Playdoh (yes Playdoh) as a platform for building simple circuits. (A Guide) Playdoh itself seems like a perfect "in" for this age group, so it seemed like a good idea for this project. So, using my favorite electronics retailer (Allelectronics.com), we stocked up on every interesting electronics component I could find (potentiometers, LEDs, switches, motors, buzzers, etc.). With this, 10 kits were made, which can be handed out to the kids when they visit. Here are a few pictures. (This entire effort has been published here.)

You (blue coat) and the kids (white coats)


Spring 2023: LS-305
Project Based Learning in STEM Education
3D printing, Arduino, Coding and Robotics
Course Details
- Learn about using the "maker movement" in K12 education.
- Open exclusively to LS majors.
- No experience needed.
- All lessons are hands-on, "learn by doing."
- We'll teach you everything you need to know about making cool STEM projects.
- Class focus: give you skills and ideas for your own STEM classroom someday.
- Think of your resume with "3D printing, Arduino, Coding and Robotics" on it!
- Final project: Develop a STEM curriculum package for your future teaching grade level!
What is this stuff?
Coding
Coding is where software comes from, and software is what tells a computer what to do. In this class, you'll learn how to instruct the computer to do just what you need it to do. We'll focus on the Scratch programming language, where you code by connecting blocks like a puzzle, like this: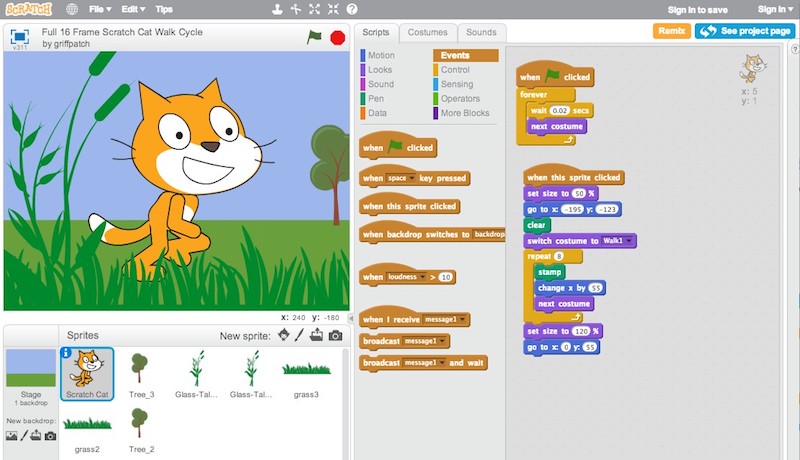
3D printing
Imagine thinking of an object, and within minutes, holding it in your hand! This is what 3D printing is all about. It is where design enters STEM. 3D printers make objects you design out of layers of plastic. Here is an Eiffel Tower being printed:
Laser cutting
You've done crafty projects using scissors and cardboard, right? Well imagine a new type of "super scissors" which is actually a laser beam that can quickly and precisely cut cardboard, allowing you to make intricate designs or mass produce a design like you've never seen before.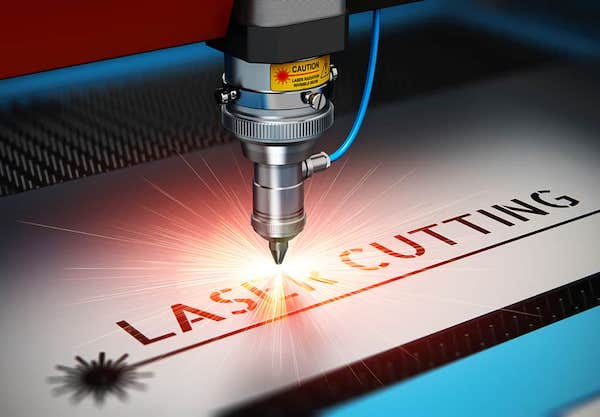
Robotics
Robotics is the ultimate in taking coding into the physical world. Here, you'll use your Scratch coding skills to command a robot (here the Finch robot) to roll around the room!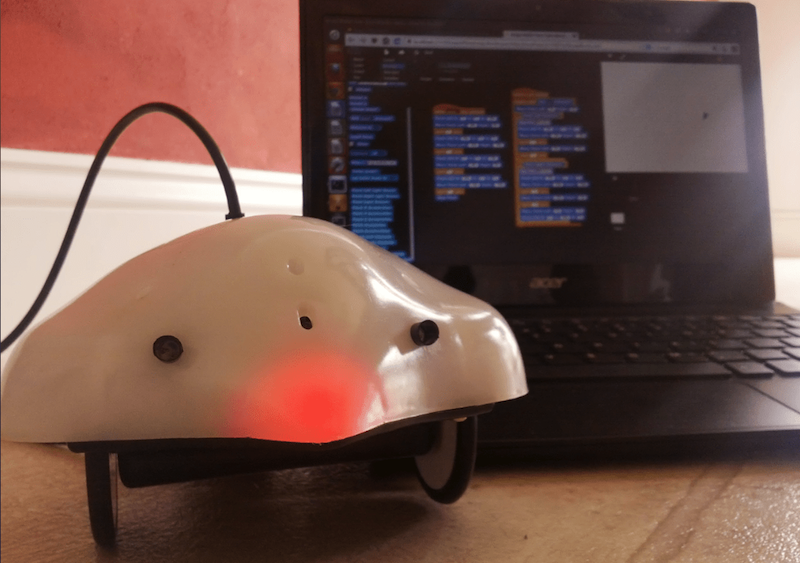
Arduino
You can hardly even think about the maker-movement without hearing the word 'Arduino.' Here it is:
Calpoly Summer in London 2026
6 week program, approximate dates: June 18 - July 31, 2026
Academics
Earn 8 units of Cal Poly GE Credit in a 6-week program in London, England!
- ASTR 324 "Longitude, Navigation, and Timekeeping" (Upper-division Area B)
- ISLA 316 "London: From Roman Colony to World Capital" (Upper-division Area D)
Scholarships
Links
- Join our Slack: https://join.slack.com/t/calpolyinlond-hez8223/shared_invite/zt-3ctd59y07-ITmsyNLLr0Awl7Xkej52ww
- Official Cal Poly London Study page
- Sign up here and Dr. Bensky will email-remind you of the upcoming info. sessions:
- For program specific inquiries, contact Study Abroad Program Coordinator, Ingrid Almaguer at ialmague@calpoly.edu.
Contact
- Questions? Want to Zoom about this? Write Tom Bensky at tbensky@calpoly.edu or stop by my office 180-616.
Program Summary
Written by Dr. Bensky (who has taught in this program before):- This program is like summer school at Cal Poly, only it is held in London.
- This is an official Cal Poly program. It is not run by an external company.
- It is run by one Cal Poly professor (Summer 2026: T. Bensky), and one London-based instructor.
- It will consist of you along with about 20 other Cal Poly students. Our academics and trips don't mix with any other students.
- We leave the Thursday after graduation in the spring, and come back around Aug 1st. (Note: Cal Poly will be on semesters in Fall 2026 and will start in late August).
- The academic program consists of six weeks of class, that mostly meet in the mornings. There are many, many day trips that serve as "the class" for the day, so we are not going there to sit in "lectures." Our classes are carefully designed and planned to use "London as a laboratory."
- Assignments and course credit come from doing things along these trips.
- There are no classes on Fridays, so at the end of each week you have 3 days off to go out and explore. This is an important part of your experience.
- There are tons of things to do in and around London (or on quick train trips--Wales, Scotland, etc.). You can even squeeze in a trip to Europe (Germany, Prague, France, etc.), which are mostly an hour away by flights (cheap on RyanAir).
- The classroom and living space are all proivded by a hosting company (Fie), here.
- The hosting company is very professional. They offer all kinds of student services, and can help you to plan side trips and give you ideas on things to do. They also have a lot of tips for "living in London on a budget."
- Your flat is a spectacularly remodeled living space in South Kensington, right by the Embassies. Here are some pictures I took of the flat. You'll have large, shared kitchen, fast Wifi, and are right across the street from Kensington Gardens (great place to jog).